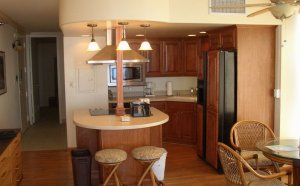
Design Your own kitchen Cabinets
 Regardless of whether you are building a stereo cabinet or dresser, a kitchen cabinet or bathroom vanity, basic cabinet construction is the same. A cabinet or furniture piece consists of the carcass or case with two sides, bottom and top, a back and a front. The front may contain drawers, doors or shelves or combinations of the three. Cabinet building has several variations which may be used in construction.
The carcass construction can be separated into three types: leg-and-rail, frame-and-panel, and box or case. Leg-and-rail construction is found on chairs, tables, benches, stools and on some furniture such as chests.
Frame-and-panel construction is used to make up the component parts of many types of furniture including the sides, doors and interior web frames with dust panels that are used on many fine, hand-built pieces of furniture.
Box or case construction is the basic design of dressers, buffets, desks and chests, as well as kitchen cabinets and bathroom vanities.
The simplest case construction is a box made of plywood. These can be softwood or hardwood plywood, and they can be painted or stained and varnished.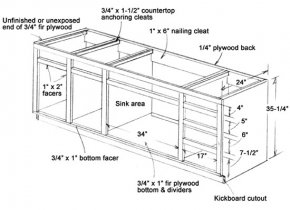 Particle board, finished on one or two sides, is a common material for construction of some cabinetry. A case can also be constructed of solid wood, but these days solid wood is used only on small pieces or for extremely fine furniture.
The simplest cabinetry is a box construction such as a kitchen cabinet. Shown is the typical construction dimensions of an applied-facer kitchen cabinet base.
Kitchen Cabinet Case Construction
Both upper and lower cabinets have the same basic construction details. On the lower cabinet, the first step is to cut the two sides. Incidentally, you can construct a custom kitchen cabinet to fit any space, rather than the small individual sections joined as with purchased cabinetry. Or you can make up smaller units and join them in the same fashion.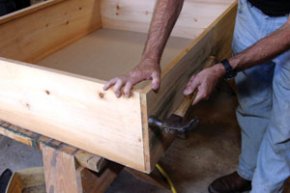 If a side is to be concealed against a wall, that side can be made of more economical plywood. The exposed side should be cut from a good hardwood- or smooth softwood-surfaced plywood.
This is the typical construction of an upper kitchen cabinet with applied facer.
The following is the simplest method of constructing, using glue and finish nails that are then set below the surface and the holes filled with wood putty. Cut a 1/4-by-1/4-inch rabbet in the inside back edge of each side piece for the cabinet back. The bottom shelf is raised above the floor on most cabinets to create a “toe-space” or kick board. Locate the position of the bottom on the side pieces and mark the kick board cut-out on each cabinet side. Cut using a saber saw.
 In most instances the bottom front facer is 1-inch in width, allowing for a 1/4-inch lip to protrude down into the toe space. Mark this location and then use a carpenter’s square to mark a line for the bottom. Cut the bottom 1/4-inch narrower than the sides, and then fasten the bottom in place with glue and finish nails, making sure it is aligned with the squared marks. Install a nailing-strip at the top back. Cut this to fit between the two sides and fasten in place with glue and finish nails. Cut the back to the correct size from 1/4-inch plywood or hardboard and, with the case lying face down, lay the back in place. Use a carpenter’s square to make sure the case is square, and then fasten the back in place with 1/2-inch staples and an air nailer, or with 3/4-inch coated nails.
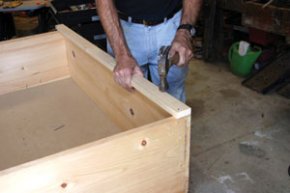
First step is to assemble the basic box, in this case of plywood, with glue and screws or nails.
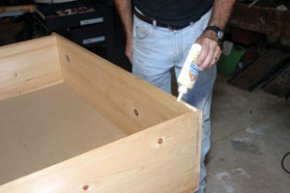
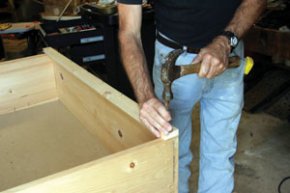
Cut the side facers first. Apply glue to the case edge.
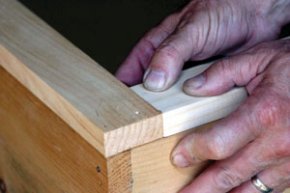
Turn the case upright and you’re ready to install the facings. Cut and install any dividers of shelves. The simplest method, especially for overlap doors, is to install veneer tape over the plywood edges. These edges must first, however, be sanded smooth. A more traditional method is to install individual facer strips over the front edges of the case. These normally fit flush with the outside edges of the case, but overlap the inside edges.

RELATED VIDEO

Share this Post
Related posts
Design your own kitchen free
Whether it is a new kitchen, doors around the home, update to your flooring or bathroom cabinets, then our FREE Design &…
Read More
Design your own bathroom Vanity
Find out how you can make your very own bathroom vanity with these awesome plans. I love how theirs turned out. My name is…
Read Morelatest posts
-
 Double oven kitchen Design June 30, 2026
 -
 Renovation of kitchen June 25, 2026
 -
 Kitchen Layout Design Ideas June 20, 2026
 -
 Walk-in in bathroom Design June 15, 2026
 -
 Green Kitchen Design Ideas June 10, 2026
 -
 Bathroom Renovation Northern Virginia June 5, 2026
 -
 Before and After kitchen Renovations May 31, 2026
 -
 Kitchen Renovation Company May 26, 2026
 -
 Kitchen Tile Design Ideas Pictures May 21, 2026
 -
 Small kitchen Design Australia May 16, 2026