Budget bathroom Renovation Ideas
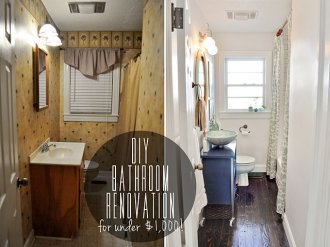 This post is a long time coming! I never thought this day would come, but our DIY budget bathroom renovation is DONE! And the grand total came in under our goal of $1, 000!
It’s [shamefully] been a YEAR since we started, so I think a refresher is necessary. Well, it didn’t really take us a whole year, but we did work on it in sporadic stages over the course of a year. This was our first major DIY undertaking, so I’m giving us a free pass on the timeline. Let’s take a walk down memory lane to summarize how we got here. I’m warning you now – this post is a BEAST! Feel free to skip to the pretty “afters” at the bottom if you want
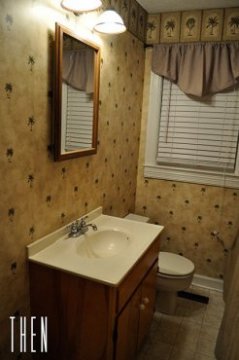
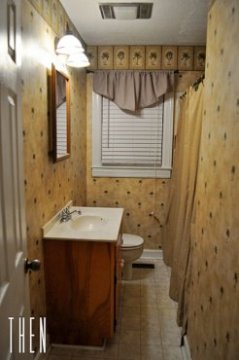 Here is how it looked when Phil bought the house – back when it was a tropical “oasis” with palm tree wallpaper.
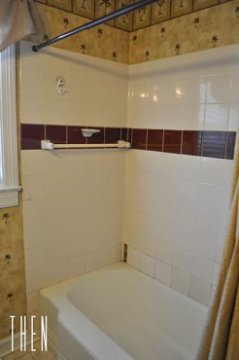
None of it was our style, and much of it was in less than ideal condition, but we thought we could update it ourselves. The old vanity was too deep for the tiny bathroom & sported a cracked and rusted vanity top.
The shower tiles were dated, the grout was stained, some tiles were loose and one even fell off the wall already. The finish on the tub was worn off, so it was permanently stained and rusted around the drain.
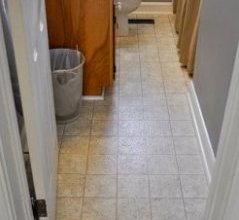
The linoleum floor had seen better days too.
This helped so much until we were ready to tackle the big renovation. Our plan to renovate the bathroom was not just for our own enjoyment, but for resale value as well. The basic look we wanted was something fresh and updated but with some vintage touches. We could only afford to spend $1, 000 to do it, but I was determined to make that money stretch as far as it could. That meant getting creative, searching for deals, putting in a TON of time and work, and making every aspect a DIY project.
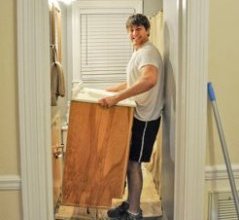
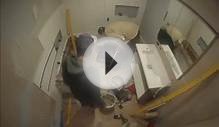
 The floor was the first project we tackled, and it was also the scariest. Demolition is the easy part…
…but then of course, it hits you that you just destroyed the only bathroom in the house. There’s no turning back now!
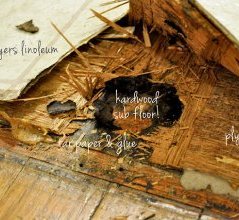
Our plan was to rip out all the layers of old flooring and install white ceramic octagon & dot tile. But then we discovered that lurking under 3 layers of linoleum, a million staples, plywood, tar paper, and glue, there was a hardwood subfloor!
Then I finished off the floor by sanding & staining it dark walnut, sealing it with spar varnish, and installing new trim. Not to mention, we got a functioning toilet back again after a week of driving to public restrooms!
We love the warmth & the natural element that the reclaimed wood brought to the room – imperfections & all.
Next, we tackled the vanity. My original vision was to convert an antique dresser into a vanity with a vessel sink top, but after weeks of searching, I couldn’t find one that fit the specific dimensions we needed for the small space. I ended up finding a metal cabinet at a Habitat for Humanity ReStore for just $7.50 that was the perfect size, so the design plan shifted to include the more industrial touch.

RELATED VIDEO


Share this Post
Related posts
Budget bathroom Renovations Brisbane
Last Updated Nov 5, 2015 · Written by Bathroom Renovation|Renovation Costs According to estimates, almost 230, bathrooms…
Read More
Small bathroom Renovation Ideas Pictures
Ideas For Small Bathroom Renovations | Bathroom Renovation Gallery
Read Morelatest posts
-
 Double oven kitchen Design June 30, 2026
 -
 Renovation of kitchen June 25, 2026
 -
 Kitchen Layout Design Ideas June 20, 2026
 -
 Walk-in in bathroom Design June 15, 2026
 -
 Green Kitchen Design Ideas June 10, 2026
 -
 Bathroom Renovation Northern Virginia June 5, 2026
 -
 Before and After kitchen Renovations May 31, 2026
 -
 Kitchen Renovation Company May 26, 2026
 -
 Kitchen Tile Design Ideas Pictures May 21, 2026
 -
 Small kitchen Design Australia May 16, 2026